

View Information About HSR Ratings
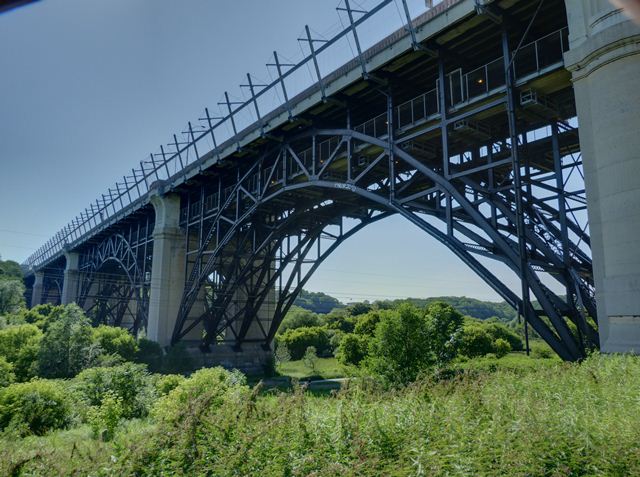
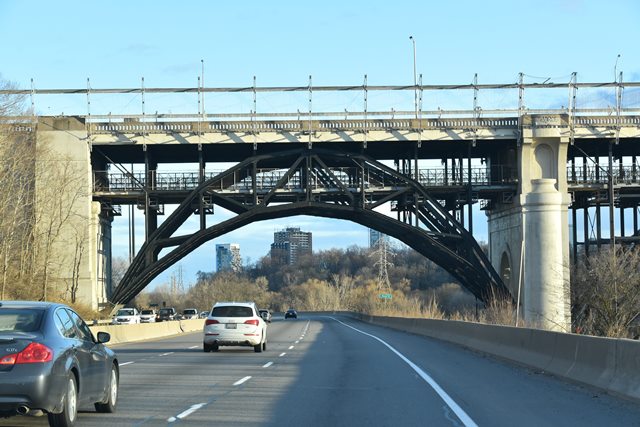
This very large landmark bridge is one of the most well-known bridges in Toronto. It is a steel braced ribbed deck arch, which itself is an unusual structure type, but its use of a crescent arch makes this bridge exceedingly rare and unusual in its design. A crescent arch has a shape that is similar to a solid ribbed arch at the skewbacks but moving toward the center of the span, the rib slowly splits in half forming a braced rib. A couple through arch bridges (like the McKeesport Bridge) in Pittsburgh, Pennsylvania also use crescent arches, but otherwise the design is largely nonexistent in North America. Some examples do exist in Europe, but they appear rare in that part of the world as well.
This bridge has a smaller brother, the Rosedale Valley Viaduct located a short distance west of this bridge. Both Serving Bloor Street, both bridges were built at the same time as part of the same project. They both share the same crescent arch main span design as well. Visit the Rosedale Valley Viaduct page to learn more about a concrete arch approach span that was part of each bridge's design. The approach span was more completely documented in historical sources for the Rosedale Valley Viaduct page, so the discussion has been placed on that page.

Based on archival drawings found in the Toronto City Archives, a variety of designs were considered, produced by more than one different engineering firm before settling on the design of bridge seen today. Most of the proposals were for concrete deck arch bridges including a couple open spandrel designs and a closed spandrel design. One of the engineers who submitted a proposal was C. A. P. Turner, a famous bridge engineer who was a leader in the development of concrete arch bridge technology, and was noted for building a number of large bridges.
Eventually however, it was designed to build a steel arch bridge instead of a concrete bridge, and in the end, the City of Toronto itself undertook the design of its bridge with Thomas Taylor taking the lead in design engineering for the bridge. However, architect Edmund W. Burke of Toronto-based Burke, Horwood, and White was hired to provide architectural design services.
The configuration of the bridge showed remarkable foresight. Although none was in place at the time, and none planned in the near future, the bridge was designed in anticipation of a subway line as a result of growth to come in future decades and so it was built with a double-deck design. The lower deck was designed to carry the subway, with vehicular and pedestrian traffic using the top deck. This lower deck remained unused for decades until 1966 when the Bloor-Danforth subway opened, and make use of this lower deck, proving that the decision to build a double-deck bridge all those decades ago was a smart one. Today, the lower deck remains in heavy use by subway trains.
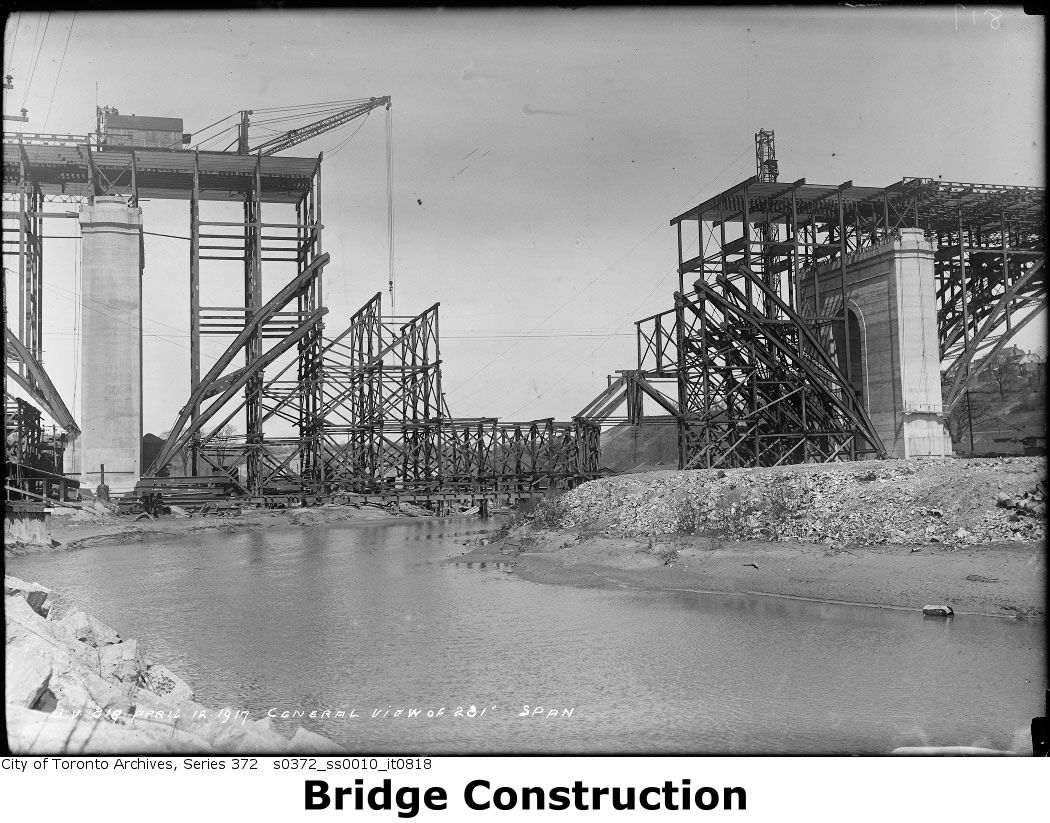
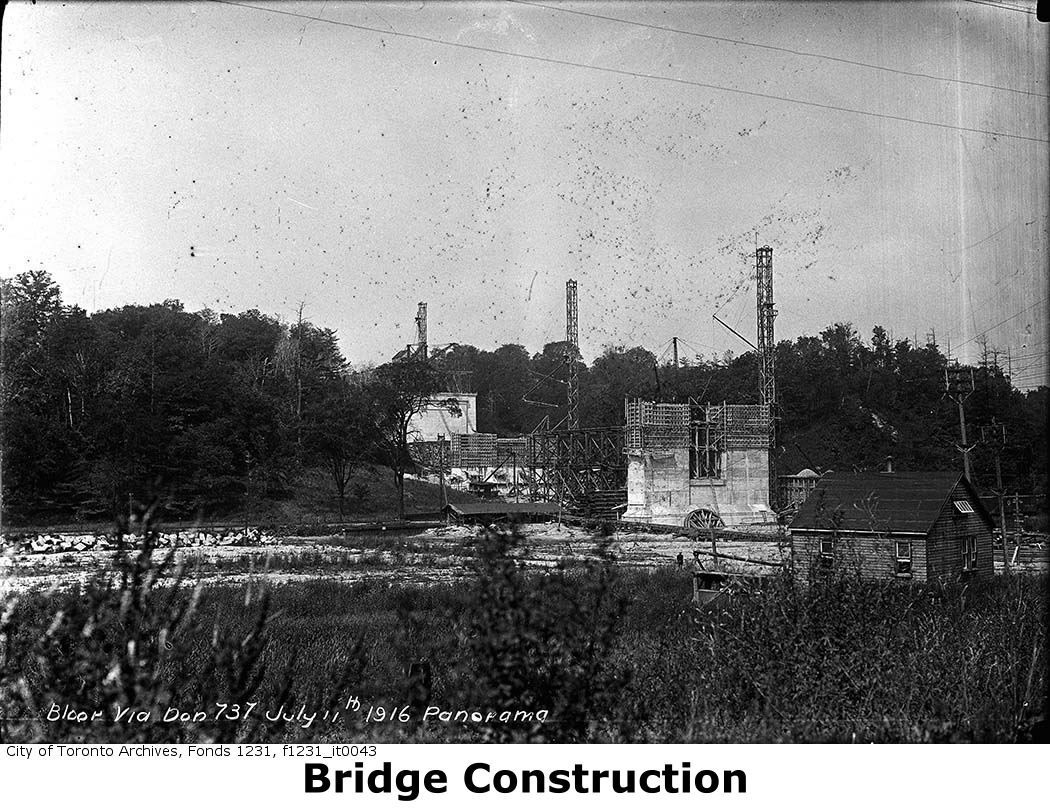
Construction of the steel arch bridges required substantial falsework to hold the arch in place until complete and able to bear load on its own. The massive piers and abutments of this bridge are concrete, and very complex wooden forms were constructed to accommodate the complex shape of the piers, as dictated by the architectural details desired.
The bridge includes balustrade railings with a unique exposed aggregate composed of red granite, which gives the railings a distinctive reddish color.

In 2003, a suicide barrier dubbed the "luminous veil" was added to the bridge. The name makes it sound a lot nicer looking than it really is. It is clear that an attempt was made to minimize the visual impact of the barrier since there are worse ways a suicide barrier could be implemented, starting with cyclone fencing. However, there is no way of avoiding the reality of a suicide barrier of this type being what it is... a massive fence added to the bridge. Although the rods that keep people from jumping off the bridge are spaced far enough apart that you can stick most camera lenses through the gap for good unobstructed photos of the valley, when you are there in person there still is a "prison" feel to having to look at the valley through bars. Looking down the sidewalk, the feeling changes from "prison bars" to having a solid wall above the balustrade railings. From below, when viewing the beautiful arches of the bridge itself, the aforementioned rods do not have a major visual impact on the bridge. However, the massive steel beams that cantilever out from the railing to hold those rods do: they are very visible from below and drastically change the appearance of the top of the bridge. It should also be noted that while adding this suicide was successful in eliminating suicides from jumping off of this particular bridge, that a study showed that overall suicides did not decrease in Toronto. People who wanted to end their lives simply found other ways of doing so. So it seems the barrier has not worked to save lives. Meanwhile, people who actually enjoy living life and want a nice looking bridge still have to deal with looking at this substantial alteration to an outstanding heritage bridge. This leads to the question as to why put up a suicide barrier? It is impossible to eliminate all ways people can commit suicide. Should a suicide barrier be put up around the Niagara Falls? People have committed suicide there. It is likely many people would not want to have to look through a similar series of bars to view the famous Niagara Falls, especially if they knew adding the barrier would not actually reduce the suicide rat. Why should it be any different with this bridge?
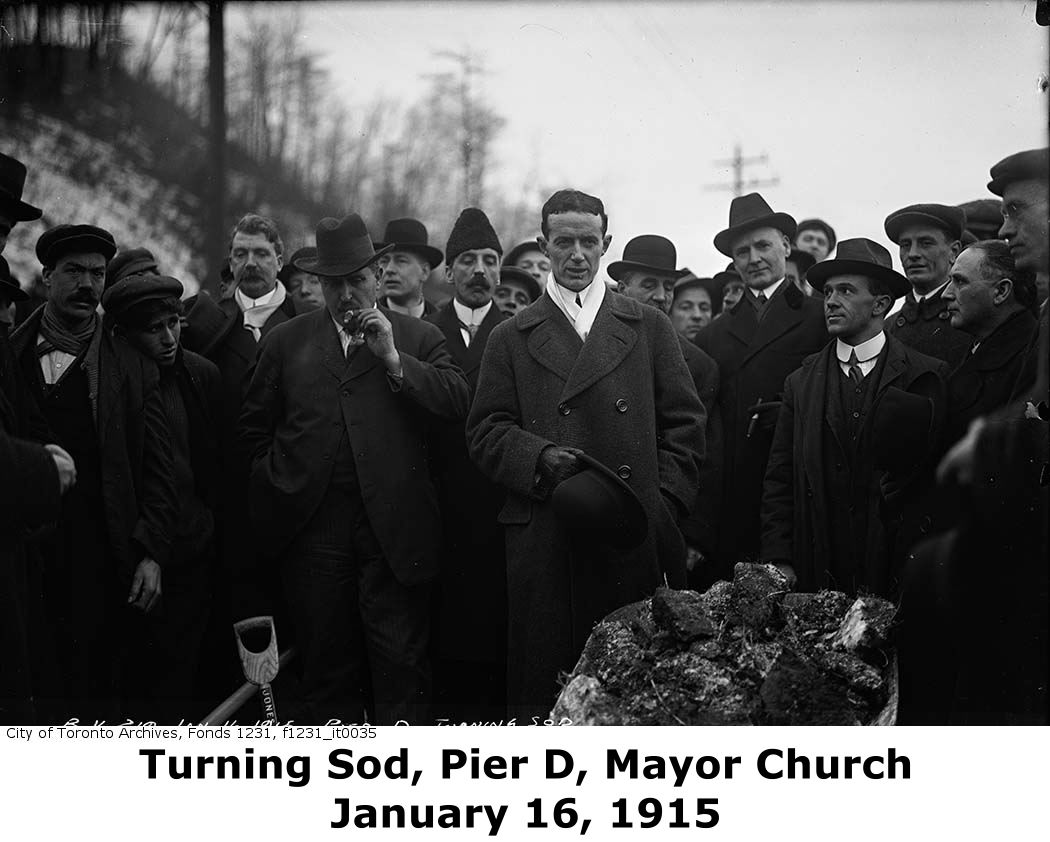

Above: These photos show the groundbreaking ceremonies for the bridge.

Above: Early stages of bridge construction.

Above: A temporary bridge was in use during construction.
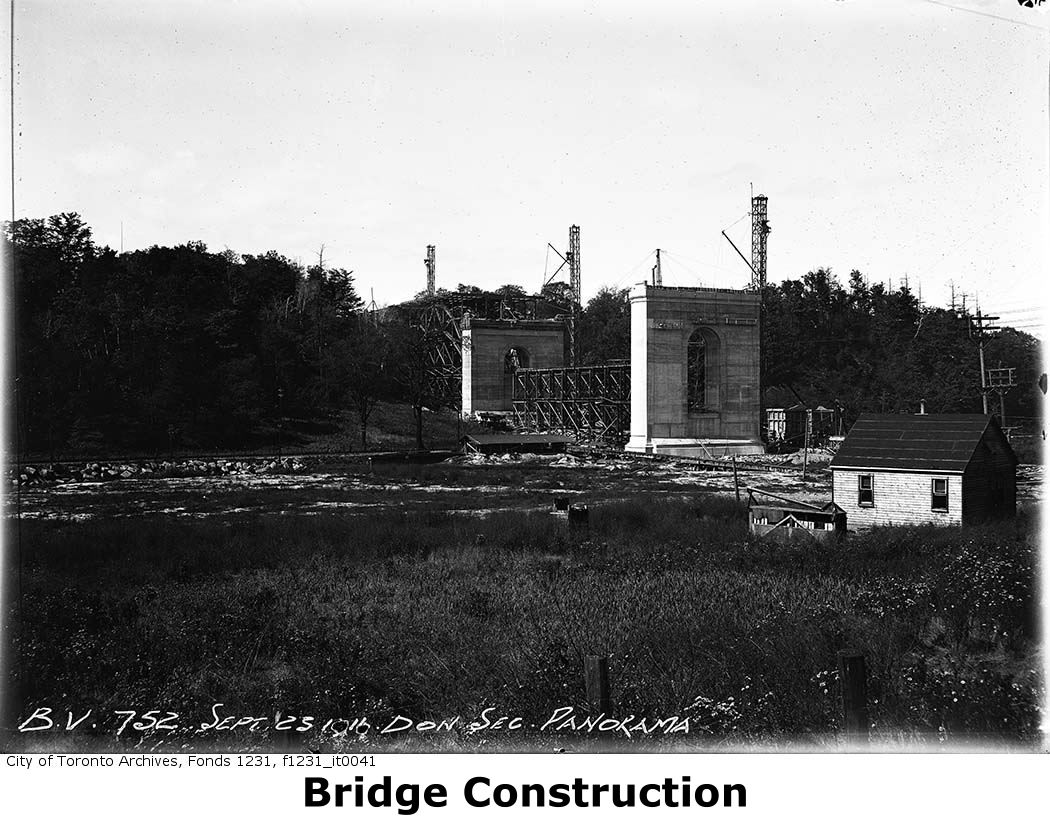

Above: Construction of the piers are clearly visible in these photos.

Above: The complex wooden forms needed for the construction of the architecturally embellished piers required very complex design. This photo is evidence of the woodworking skills needed to make this concrete substructure a reality.

Above: This photo shows the first section of an arch span being erected.


Above: These photos show arch spans under construction.

Above: Constructing an arch span, with the arch rib nearly connected at the center.

Above: View of an arch span, with the arch rib itself complete and bearing loads, but the deck and pier still under construction.

Above: Complete arch span with falsework still present.


Above: These photos show the construction of the deck surface.
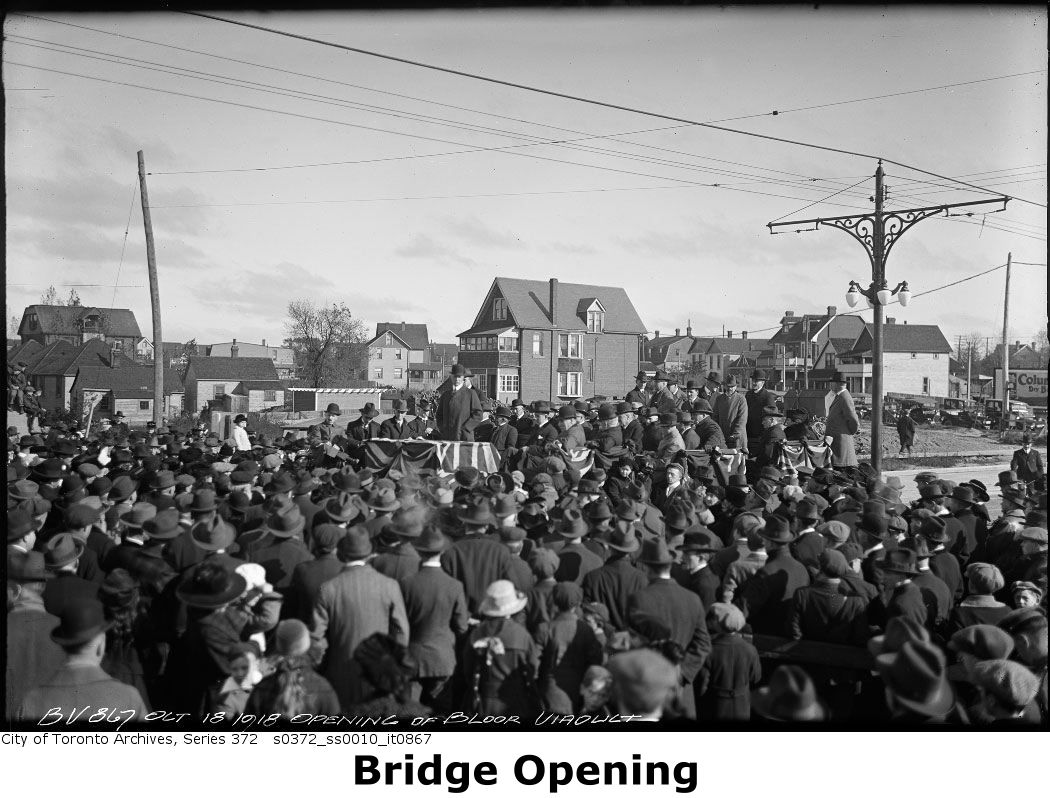
Above: Photo of the bridge opening ceremonies.


Above: Historical photos showing the bridge soon after completion.

This bridge is tagged with the following special condition(s): Unorganized Photos
![]()
![]()
![]()
![]()
![]()
Coordinates (Latitude, Longitude):
Search For Additional Bridge Listings:
Additional Maps:
Google Streetview (If Available)
GeoHack (Additional Links and Coordinates)
Apple Maps (Via DuckDuckGo Search)
Apple Maps (Apple devices only)
Android: Open Location In Your Map or GPS App
Flickr Gallery (Find Nearby Photos)
Wikimedia Commons (Find Nearby Photos)
Directions Via Sygic For Android
Directions Via Sygic For iOS and Android Dolphin Browser

© Copyright 2003-2024, HistoricBridges.org. All Rights Reserved. Disclaimer: HistoricBridges.org is a volunteer group of private citizens. HistoricBridges.org is NOT a government agency, does not represent or work with any governmental agencies, nor is it in any way associated with any government agency or any non-profit organization. While we strive for accuracy in our factual content, HistoricBridges.org offers no guarantee of accuracy. Information is provided "as is" without warranty of any kind, either expressed or implied. Information could include technical inaccuracies or errors of omission. Opinions and commentary are the opinions of the respective HistoricBridges.org member who made them and do not necessarily represent the views of anyone else, including any outside photographers whose images may appear on the page in which the commentary appears. HistoricBridges.org does not bear any responsibility for any consequences resulting from the use of this or any other HistoricBridges.org information. Owners and users of bridges have the responsibility of correctly following all applicable laws, rules, and regulations, regardless of any HistoricBridges.org information.
![]()